在Docker下载Nginx镜像
docker pull nginx
docker images

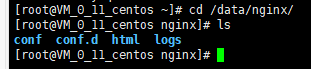
创建挂载目录
mkdir -p /data/nginx/{conf,conf.d,html,logs}
编写nginx,conf配置文件,并放在文件夹中
# For more information on configuration, see:
#  * Official English Documentation: http://nginx.org/en/docs/
#  * Official Russian Documentation: http://nginx.org/ru/docs/

user nginx;
worker_processes auto;
error_log /var/log/nginx/error.log;
pid /run/nginx.pid;

# Load dynamic modules. See /usr/share/nginx/README.dynamic.
include /usr/share/nginx/modules/*.conf;

events {
  worker_connections 1024;
}

http {
  log_format main '$remote_addr - $remote_user [$time_local] "$request" '
           '$status $body_bytes_sent "$http_referer" '
           '"$http_user_agent" "$http_x_forwarded_for"';

  access_log /var/log/nginx/access.log main;

  sendfile      on;
  tcp_nopush     on;
  tcp_nodelay     on;
  keepalive_timeout  65;
  types_hash_max_size 2048;

  include       /etc/nginx/mime.types;
  default_type    application/octet-stream;

  # Load modular configuration files from the /etc/nginx/conf.d directory.
  # See http://nginx.org/en/docs/ngx_core_module.html#include
  # for more information.
  include /etc/nginx/conf.d/*.conf;

  server {
    listen    80 default_server;
    listen    [::]:80 default_server;
    server_name 182.254.161.54;
    root     /usr/share/nginx/html;

    # Load configuration files for the default server block.
    include /etc/nginx/default.d/*.conf;

    location / {
    proxy_pass http://pic;
    }

    error_page 404 /404.html;
      location = /40x.html {
    }

    error_page 500 502 503 504 /50x.html;
      location = /50x.html {
    }
  }

  upstream pic{
        server 182.254.161.54:8088 weight=5;
        server 182.254.161.54:8089 weight=5;
  }

}
启动容器
查看启动的容器
docker ps

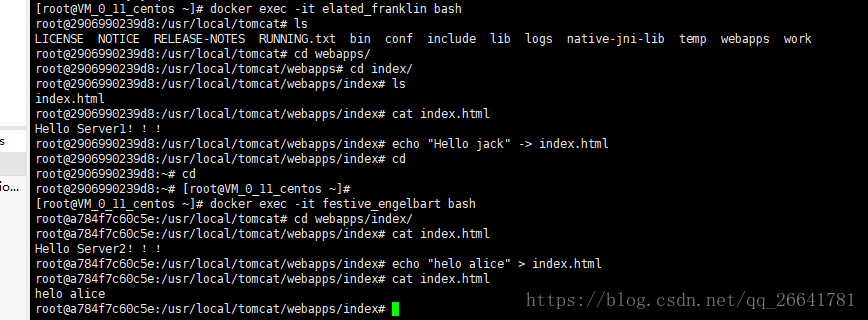
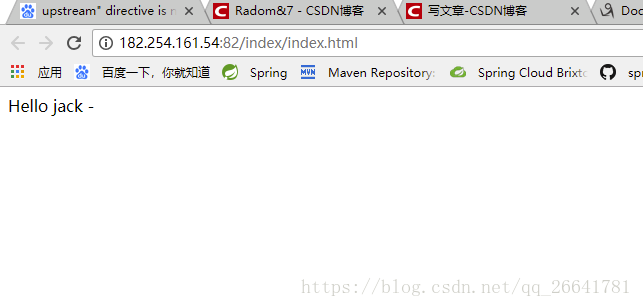
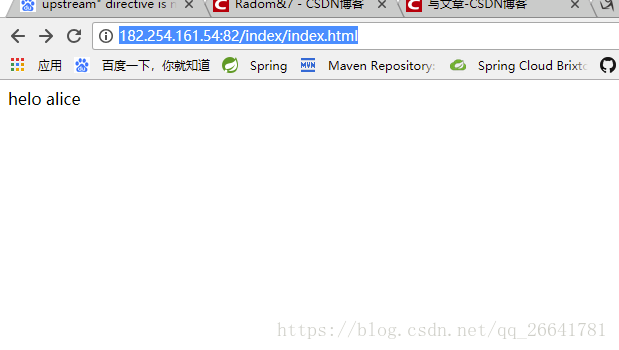
先前已经在Docker部署两个tomcat,一个是8088端口,另一个是8089端口,并进入两个容器里编写了简单的页面
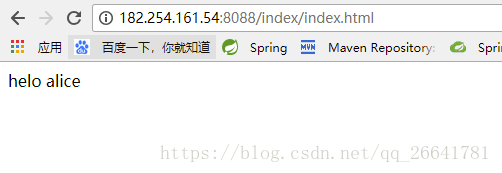
访问8088端口
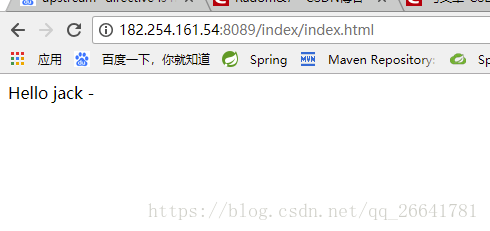
访问8089端口
现在通过Nginx访问两个tomcat的内容,实现负载均衡的功能,出于区别,更能体现负载均衡的功能,两个页面的内容不一样,但是访问路径都一样,只是通过Nginx反向代理去轮换访问
以上就是本文的全部内容,希望对大家的学习有所帮助,也希望大家多多支持脚本之家。