一. 准备
1.1 下载 xdebug
我本地用的是 phpStudy 的集成环境, php 版本是 7.2.10
在 Xdebug 下载地址(https://xdebug.org/download/historical)找到合适的版本(这边包含历史版本),我选的是 PHP 7.2 VC15 (32 bit)
1.2 配置 PHP
将下载好的文件放入 php 下的 ext 文件夹内,以我本机为例 (E:\Castle\phpStudy\PHPTutorial\php\php-7.2.1-nts\ext)
php.ini 拉到最下面,加上以下内容
[XDebug]
xdebug.profiler_output_dir="E:\Castle\phpStudy\PHPTutorial\tmp\xdebug"
xdebug.trace_output_dir="E:\Castle\phpStudy\PHPTutorial\tmp\xdebug"
zend_extension="E:\Castle\phpStudy\PHPTutorial\php\php-7.2.1-nts\ext\php_xdebug-2.9.5-7.2-vc15-nts.dll"
xdebug.remote_enable = 1
xdebug.remote_handler = dbgp
xdebug.remote_host = "localhost"
xdebug.remote_mode = req
xdebug.remote_port = 9010
xdebug.idekey="PHPSTORM"
xdebug.remote_autostart = 1
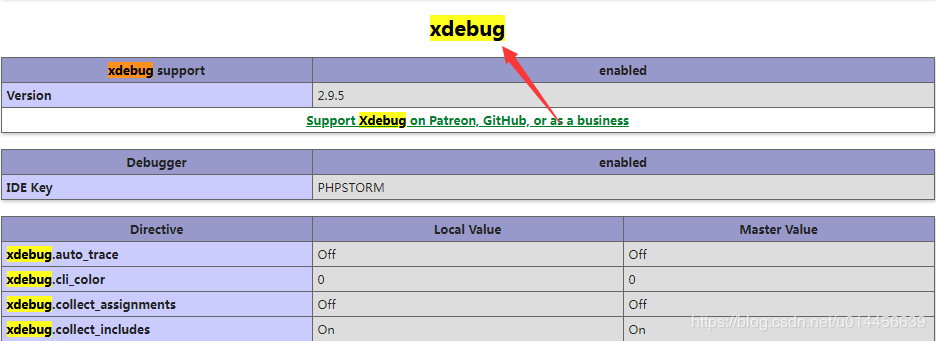
1.3 打印 phpinfo() 页面
看 Xdebug 是不是已经有了,如果没有一般都是下载的版本错了
二. PhpStorm 配置
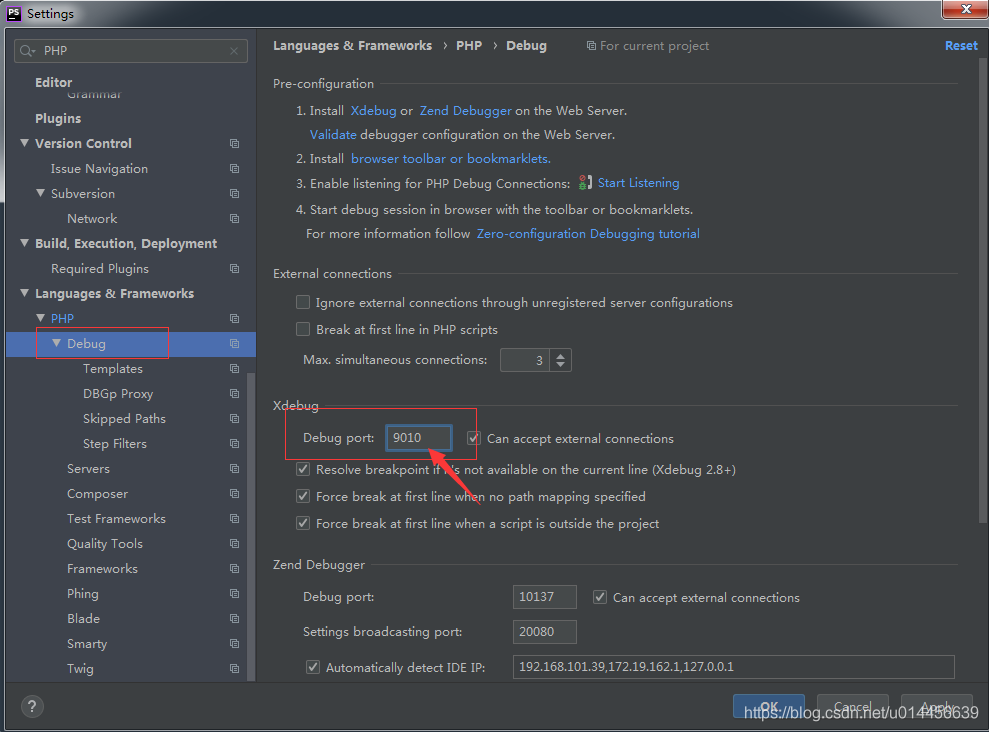
2.1 Settings 处的配置
2.1.1 从 File > Settings,输入 PHP,红框处的就是我们需要配置的地方

2.1.2 先配置一下 PHP 的版本(我本地用的 7.2,)

2.1.3 Debug port 这边的值用之前在 php.ini 里面新增的值,其它不动
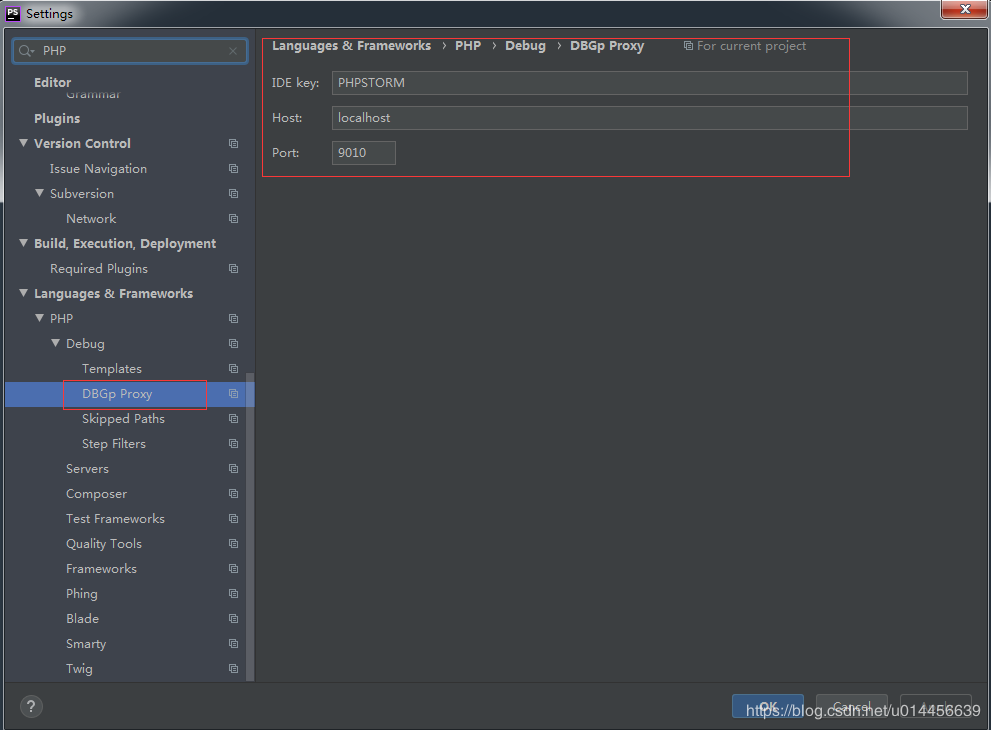
2.1.4 DBGp Proxy 这边的值也使用之前 php.ini 里面新增的
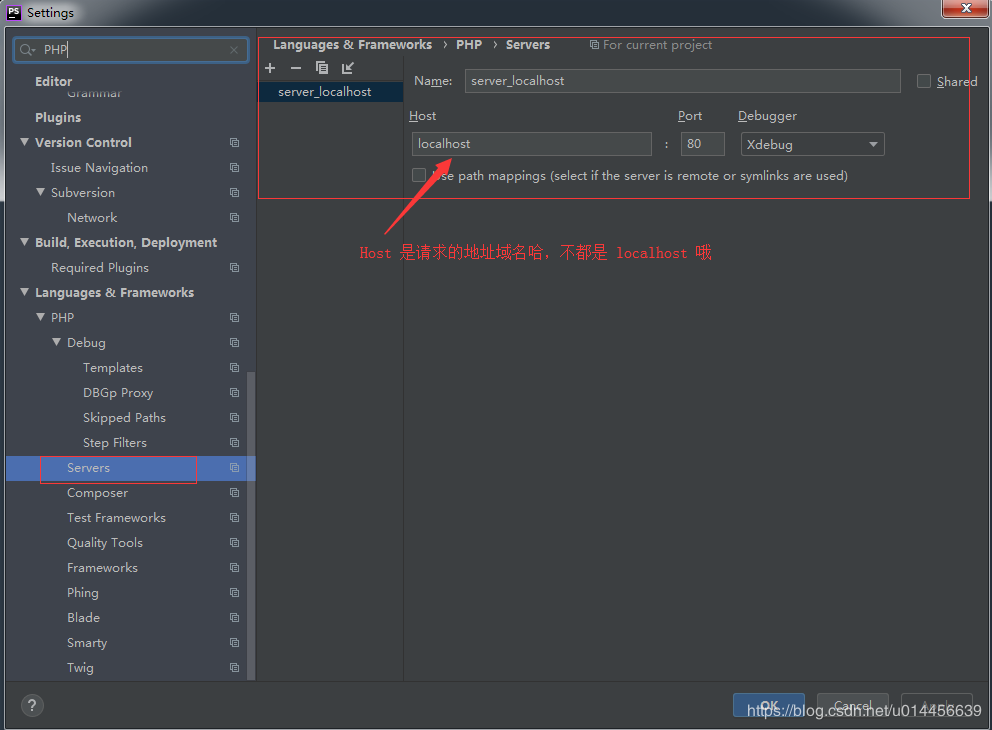
2.1.5 配置 Servers (到这边为止设置里面就配置完毕了)
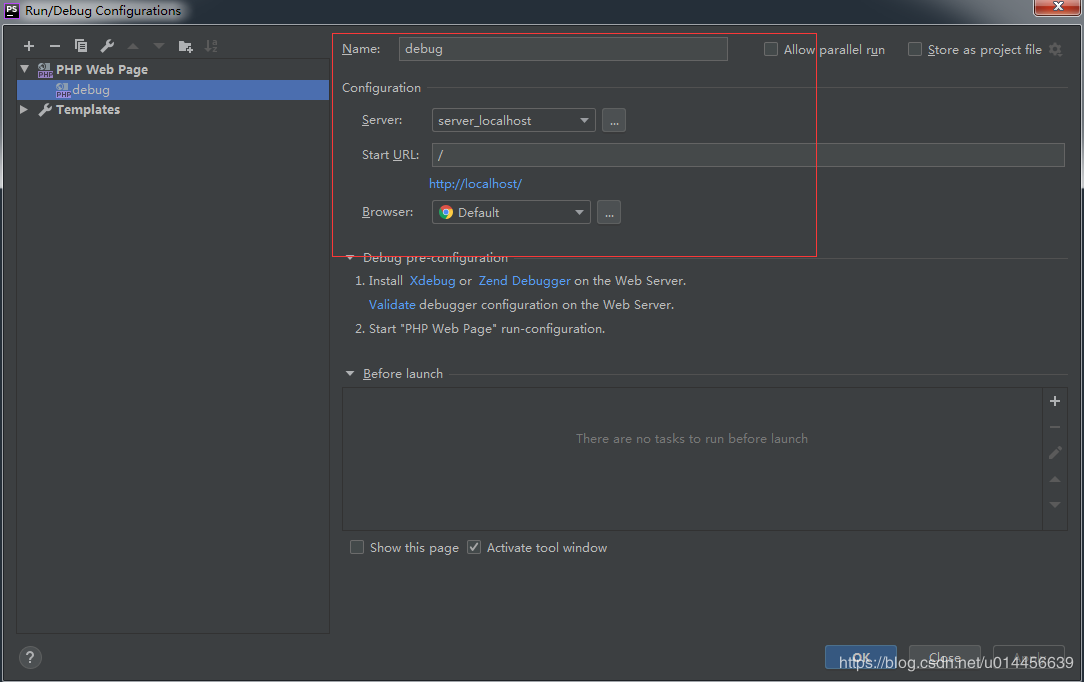
2.2 新增 debug 配置
2.2.1 从箭头处进入,选择 PHP Web Page 新建


2.2.2 配置完毕
三. 举例说明
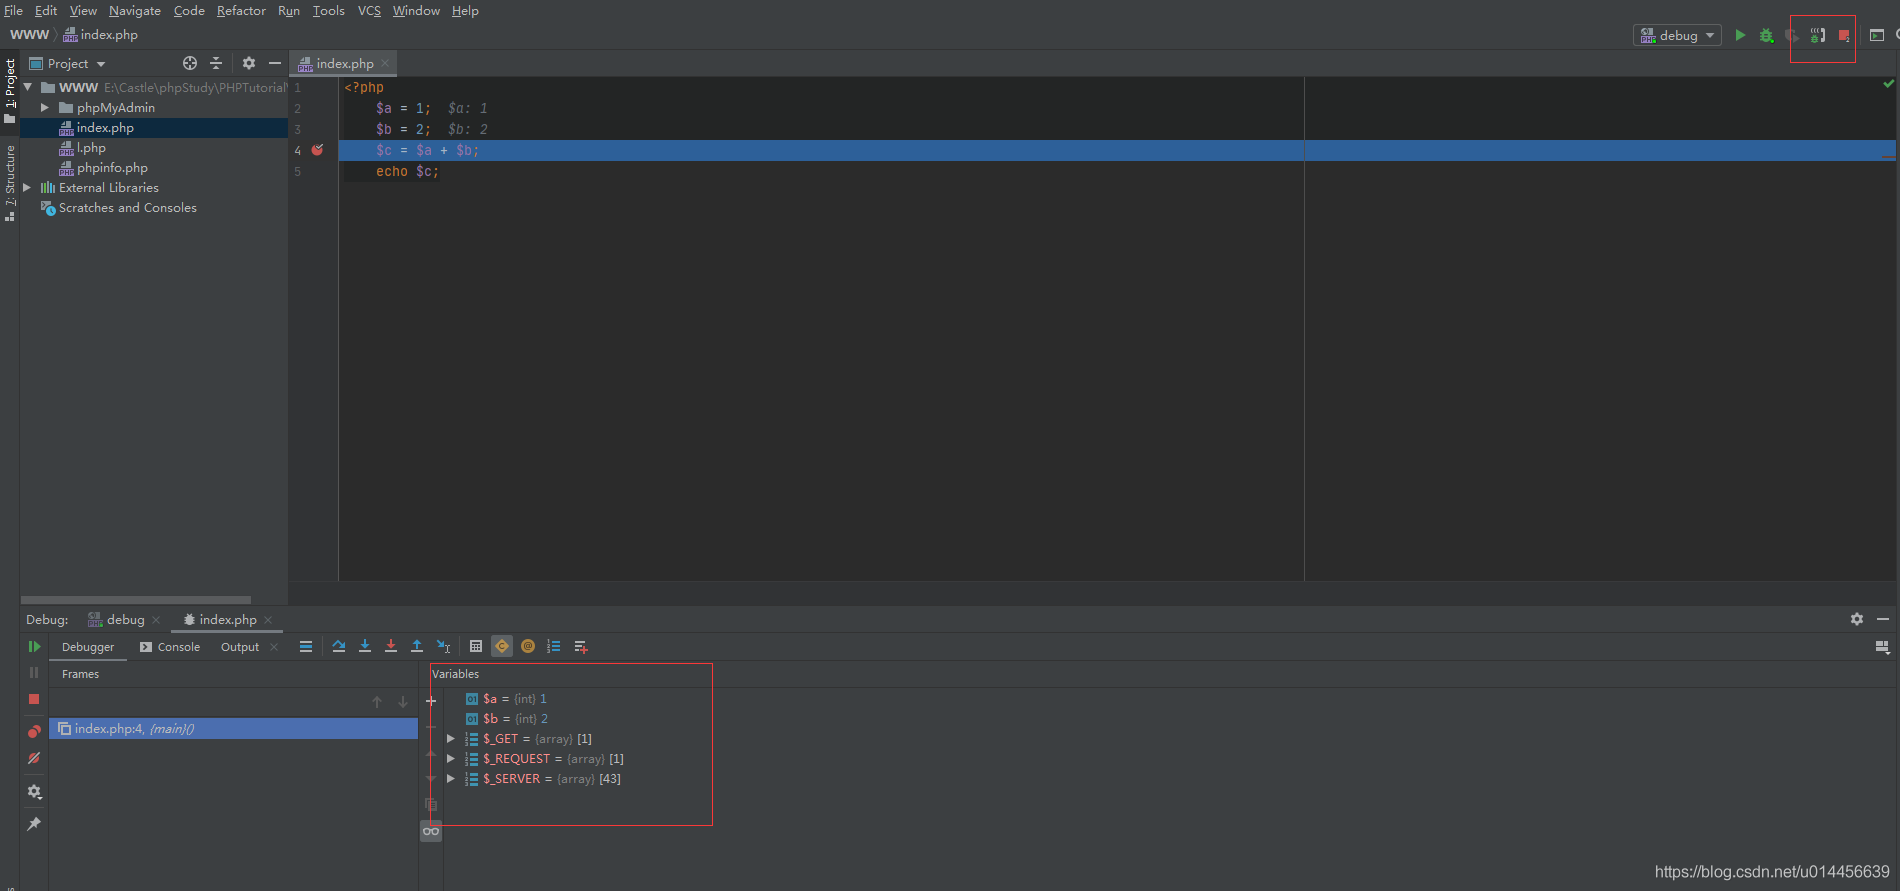
3.1 在前面打上断点,正常就会出现如下内容啦
3.2 postman 请求 (基本没有区别,唯一要注意的就是 2.1.5 配置 Servers 这边的 Host 配置了,你的请求域名是什么就填什么就可以了)
总结
到此这篇关于PhpStorm2020.1 安装 debug - Postman 调用的文章就介绍到这了,更多相关PhpStorm2020.1 安装 debug内容请搜索脚本之家以前的文章或继续浏览下面的相关文章希望大家以后多多支持脚本之家!