selenium处理文件上传大致会有两种情况,一种是文件上传使用的是input标签元素,即input type="file">,那么对这个input标签元素使用sendkeys方法输入文件的路径就可以完成上传,另一种是调用windows系统完成文件上传,即文件上传会弹出windows弹窗,此时则需要借助Autoit这样一个小工具结合selenium完成。
1、文件上传使用的是input标签元素,selenium+python代码示例参考如下:
import time
from selenium import webdriver

# 实例化浏览器,访问目标网页,窗口最大化
driver = webdriver.Chrome()
driver.get("https://www.layui.com/v1/demo/upload.html")
driver.maximize_window()
# 定位上传元素
element=driver.find_element_by_xpath("//input[@type='file' and @lay-type='file']")
time.sleep(2)
# 输入文件路径,上传文件
element.send_keys("D:\\timg.jpg")
time.sleep(2)
# 退出浏览器
driver.quit()
2、windows系统弹窗完成文件上传,需使用Autoit;具体操作步骤如下。
第一步,安装Autoit,下载后,默认安装即可。
第二步,Autoit脚本编写,Autioit脚本执行的内容主要从打开上传按钮后开始。
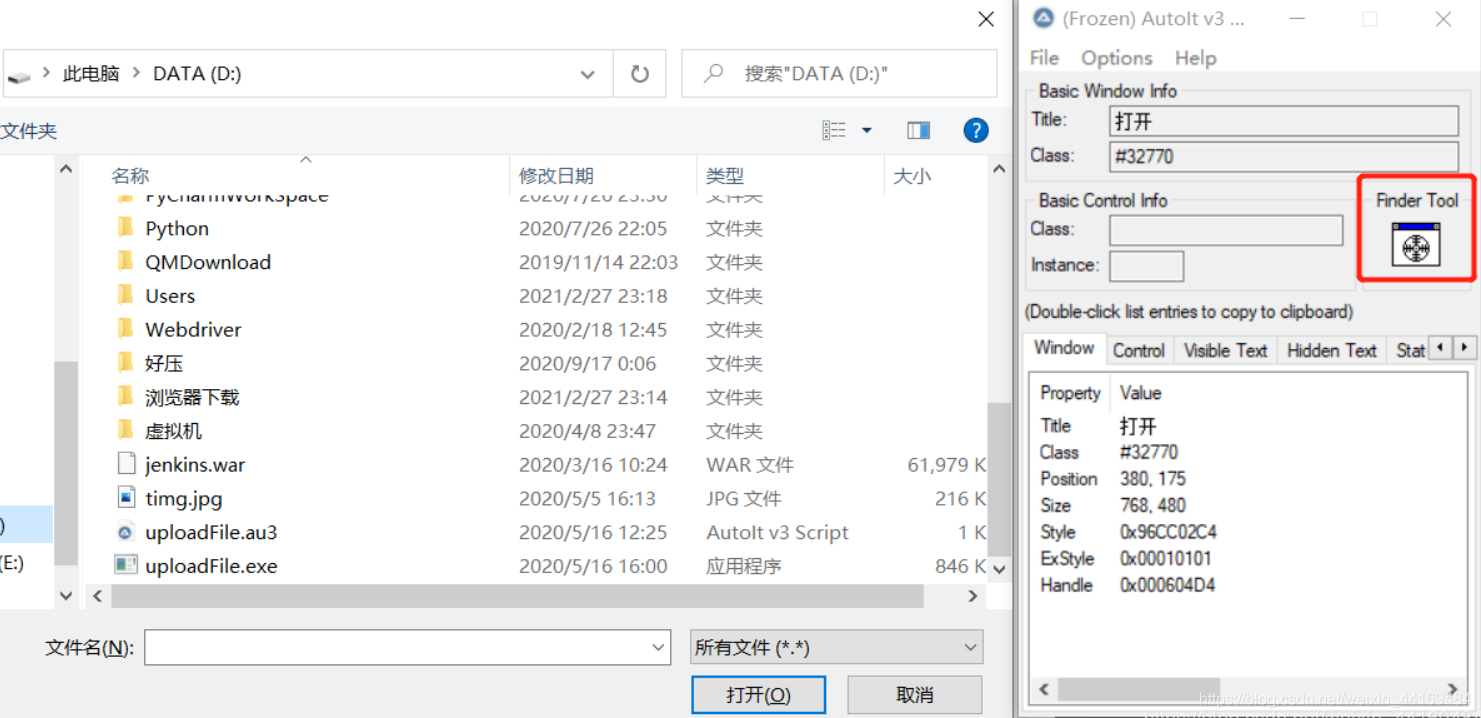
(1)使用Autoit windows info组件识别windows窗口中的元素

按住Finder Tool按钮后拖动到指定位置识别元素,显示元素的各种属性。
(2)使用SciTE Script Editor组件编写文件上传脚本

脚本解释如下:
ControlFocus("打开","","Edit1");表示将当前的焦点聚焦到打开的弹窗上
ControlSetText("打开","","Edit1","D:\timg.jpg");表示选中需要上传的文件
ControlClick("打开","","Button1");表示点击弹窗中的打开按钮
(3)保存编写脚本,将编写的脚本转化为exe格式;选中编写的脚本,点击鼠标右键选择Compile Script点击确定。

第三步,selenium与Autoit脚本结合,实现文件上传。
(1)使用selenium点击文件上传按钮
(2)使用Java中的Runtime类引入Autoit脚本
例如编写完成的Autoit脚本存放在D盘根目录下,则引入方式为:Runtime.getRuntime().exec(“D:upload.exe”)
(3)完成后续操作
Autoit+selenium+python完成文件上传代码示例参考如下:
import os
import time
from selenium import webdriver

# 实例化浏览器,访问目标网页,窗口最大化
driver = webdriver.Chrome()
driver.get("https://www.layui.com/v1/demo/upload.html")
driver.maximize_window()
# 点击上传按钮
driver.find_element_by_xpath("//input[@type='file'and @lay-type='file']").click()
# 运行Autoit脚本,执行上传
os.system("D:upload.exe")
# 停留2秒
time.sleep(2)
# 退出浏览器
driver.quit()
到此这篇关于selenium+python实现文件上传操作的文章就介绍到这了,更多相关selenium+python文件上传内容请搜索脚本之家以前的文章或继续浏览下面的相关文章希望大家以后多多支持脚本之家!