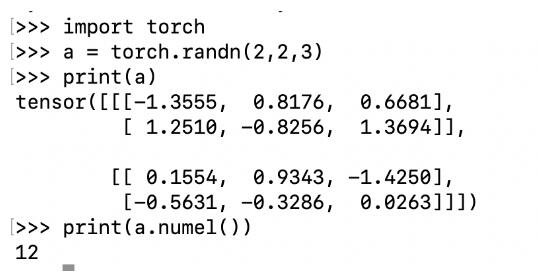
返回param中元素的数量

num_params = sum(param.numel() for param in net.parameters())
print(num_params)
补充:Pytorch 查看模型参数
查看利用Pytorch搭建模型的参数,直接看程序
import torch
# 引入torch.nn并指定别名
import torch.nn as nn
import torch.nn.functional as F

class Net(nn.Module):
    def __init__(self):
        # nn.Module子类的函数必须在构造函数中执行父类的构造函数
        super(Net, self).__init__()

        # 卷积层 '1'表示输入图片为单通道, '6'表示输出通道数,'3'表示卷积核为3*3
        self.conv1 = nn.Conv2d(1, 6, 3)
        #线性层,输入1350个特征,输出10个特征
        self.fc1   = nn.Linear(1350, 10)  #这里的1350是如何计算的呢?这就要看后面的forward函数
    #正向传播
    def forward(self, x):
        print(x.size()) # 结果:[1, 1, 32, 32]
        # 卷积 -> 激活 -> 池化
        x = self.conv1(x) #根据卷积的尺寸计算公式,计算结果是30,具体计算公式后面第二张第四节 卷积神经网络 有详细介绍。
        x = F.relu(x)
        print(x.size()) # 结果:[1, 6, 30, 30]
        x = F.max_pool2d(x, (2, 2)) #我们使用池化层,计算结果是15
        x = F.relu(x)
        print(x.size()) # 结果:[1, 6, 15, 15]
        # reshape,‘-1'表示自适应
        #这里做的就是压扁的操作 就是把后面的[1, 6, 15, 15]压扁,变为 [1, 1350]
        x = x.view(x.size()[0], -1)
        print(x.size()) # 这里就是fc1层的的输入1350
        x = self.fc1(x)
        return x

net = Net()
for parameters in net.parameters():
    print(parameters)
输出为:
Parameter containing:
tensor([[[[-0.0104, -0.0555, 0.1417],
[-0.3281, -0.0367, 0.0208],
[-0.0894, -0.0511, -0.1253]]],
[[[-0.1724, 0.2141, -0.0895],
[ 0.0116, 0.1661, -0.1853],
[-0.1190, 0.1292, -0.2451]]],
[[[ 0.1827, 0.0117, 0.2880],
[ 0.2412, -0.1699, 0.0620],
[ 0.2853, -0.2794, -0.3050]]],
[[[ 0.1930, 0.2687, -0.0728],
[-0.2812, 0.0301, -0.1130],
[-0.2251, -0.3170, 0.0148]]],
[[[-0.2770, 0.2928, -0.0875],
[ 0.0489, -0.2463, -0.1605],
[ 0.1659, -0.1523, 0.1819]]],
[[[ 0.1068, 0.2441, 0.3160],
[ 0.2945, 0.0897, 0.2978],
[ 0.0419, -0.0739, -0.2609]]]])
Parameter containing:
tensor([ 0.0782, 0.2679, -0.2516, -0.2716, -0.0084, 0.1401])
Parameter containing:
tensor([[ 1.8612e-02, 6.5482e-03, 1.6488e-02, ..., -1.3283e-02,
1.8715e-02, 5.4037e-03],
[ 1.8569e-03, 1.8022e-02, -2.3465e-02, ..., 1.6527e-03,
2.0443e-02, -2.2009e-02],
[ 9.9104e-03, 6.6134e-03, -2.7171e-02, ..., -5.7119e-03,
2.4532e-02, 2.2284e-02],
...,
[ 6.9182e-03, 1.7279e-02, -1.7783e-03, ..., 1.9354e-02,
2.1105e-03, 8.6245e-03],
[ 1.6877e-02, -1.2414e-02, 2.2409e-02, ..., -2.0604e-02,
1.3253e-02, -3.6008e-03],
[-2.1598e-02, 2.5892e-02, 1.9372e-02, ..., 1.4159e-02,
7.0983e-03, -2.3713e-02]])
Parameter containing:
tensor(1.00000e-02 *
[ 1.4703, 1.0289, 2.5069, -2.2603, -1.5218, -1.7019, 1.2569,
0.4617, -2.3082, -0.6282])
for name,parameters in net.named_parameters():
    print(name,':',parameters.size())
输出:
conv1.weight : torch.Size([6, 1, 3, 3])
conv1.bias : torch.Size([6])
fc1.weight : torch.Size([10, 1350])
fc1.bias : torch.Size([10])
以上为个人经验,希望能给大家一个参考,也希望大家多多支持脚本之家。