一、GO语言安装
详情查看:GO语言下载、安装、配置
二、GoLang插件介绍
对于Visual Studio Code开发工具,有一款优秀的GoLang插件,它的主页为:https://github.com/microsoft/vscode-go
这款插件的特性包括:
Colorization 代码着彩色
Completion Lists 代码自动完成(使用gocode)
Snippets 代码片段
Quick Info 快速提示信息(使用godef)
Goto Definition 跳转到定义(使用godef)
Find References 搜索参考引用(使用go-find-references)
File outline 文件大纲(使用go-outline)
Workspace symbol search 工作区符号搜索(使用 go-symbols)
Rename 重命名(使用gorename)
Build-on-save 保存构建(使用go build和go test)
Format 代码格式化(使用goreturns或goimports或gofmt)
Add Imports 添加引用(使用 gopkgs)
Debugging 调试代码(使用delve)
本插件的安装教程,请查看《Windows环境下vscode-go安装日记》
三、插件安装
3.1 Visual Studio Code
找到微软的官方网站,下载Visual Studio Code,官网地址 https://code.visualstudio.com/
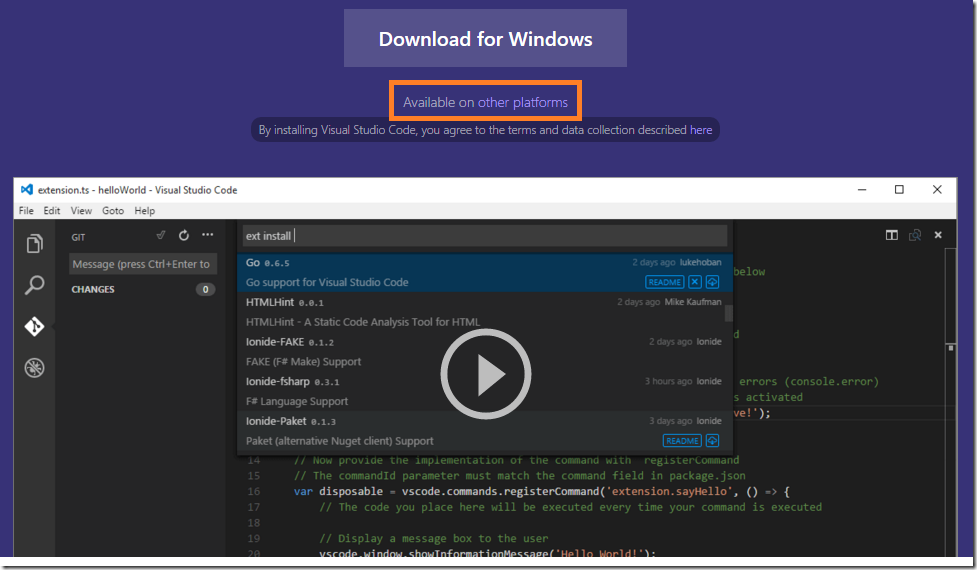
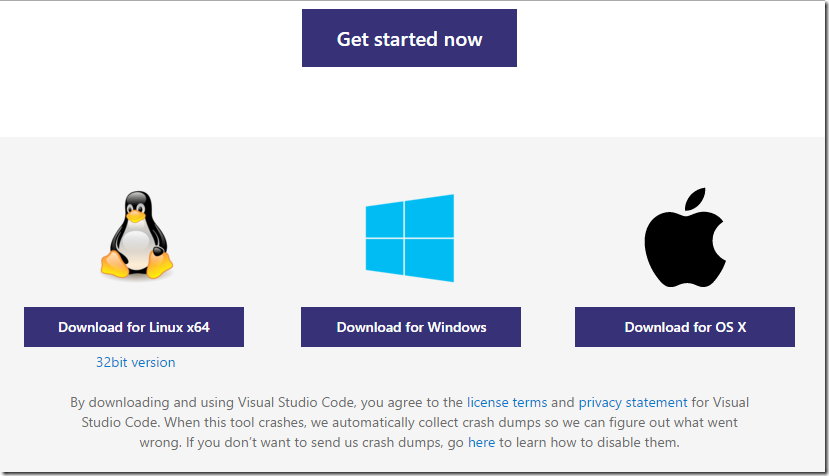
点击上图红框,可以下载其他平台的编辑器,如下图:
下载安装过程省略,当前版本是:
3.2 安装插件
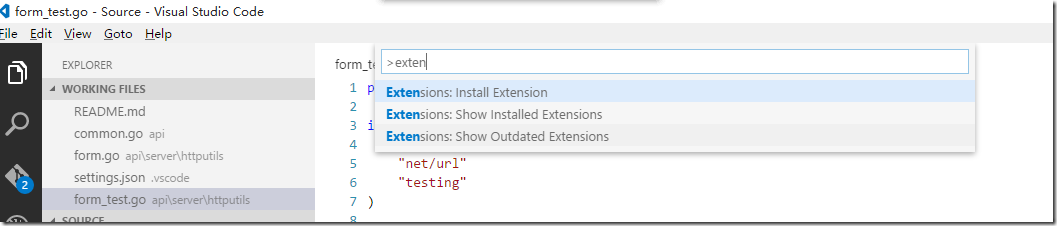
进入Visual Studio Code,使用快捷键F1,打开命令面板
在上图光标处·输入exten ,然后选择“Extensions:Install Extension”,如下图:
查询插件:

显示插件列表:
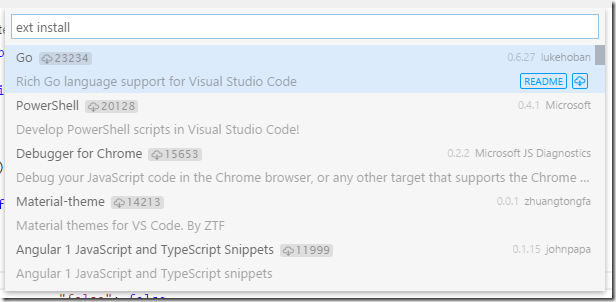
在插件列表中,选择 Go,进行安装,安装之后,系统会提示重启Visual Studio Code。
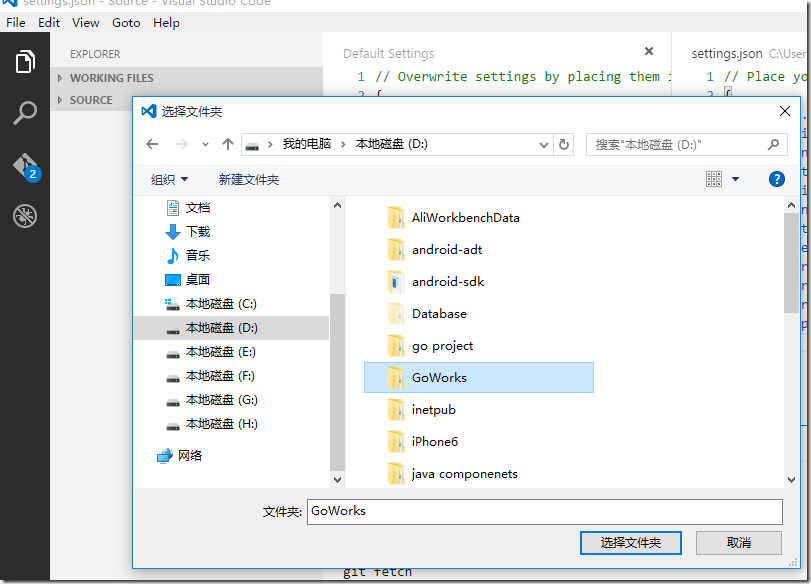
3.3 设置环境变量GOPATH
在Windows系统中设置GOPATH环境变量,我的值为D:\GoWorks
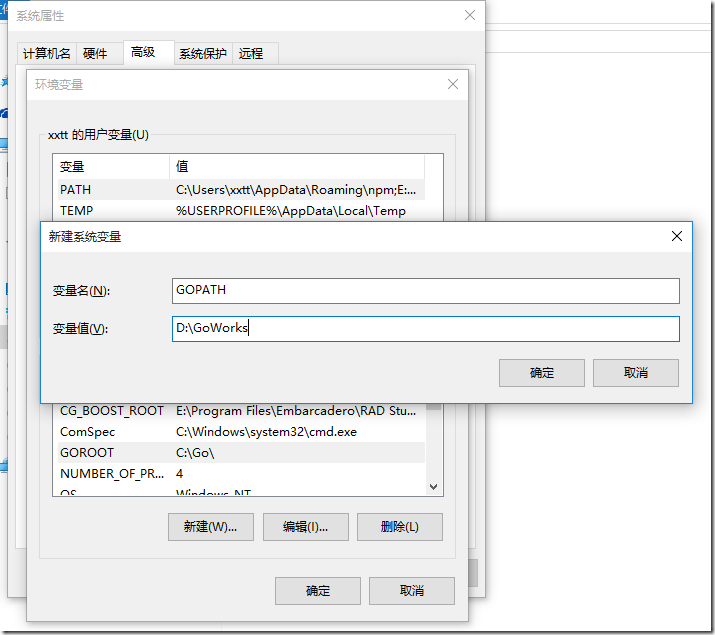
缺少GOPATH环境变量通常会报“$GOPATH not set.”这样的错误。
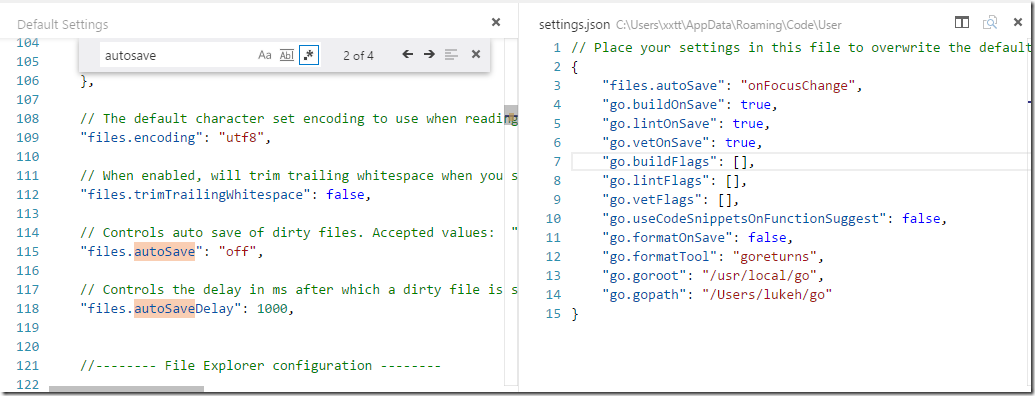
3.4 开启Visual Studio Code自动保存功能
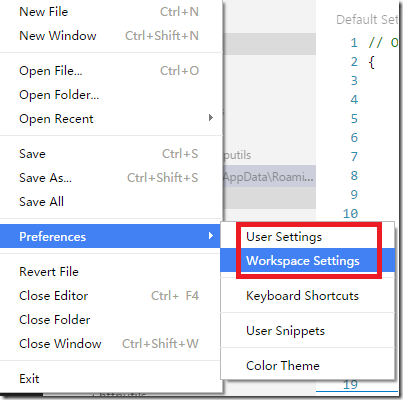
打开Visual Studio Code,找到菜单File->Preferences->User Settings,如下图:

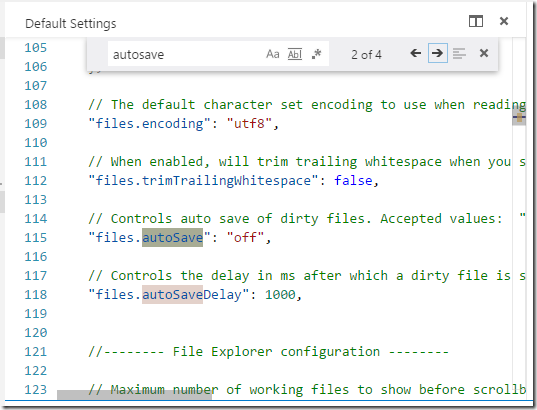
添加或更改settings.json的“files.autoSave”属性为“onFocusChange”,并保存。
3.5 安装Git
Windows安装Git的过程省略;安装之后git\bin配置到PATH环境变量中。

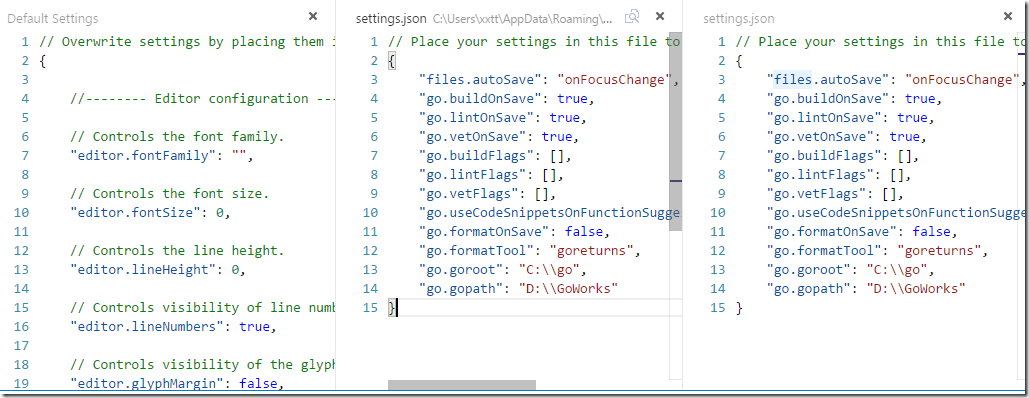
四、插件配置4.1 Visual Studio Code Go插件配置选项
Visual Studio Code的配置选项支持Go插件的设置,可以通过用户偏好设置或workspace设置进行配置。在菜单File->Preferences处可以找到。
在settings.json中设置go配置环境,如下图:
4.2 执行命令
详情请查看官方网站:https://marketplace.visualstudio.com/items?itemName=lukehoban.Go
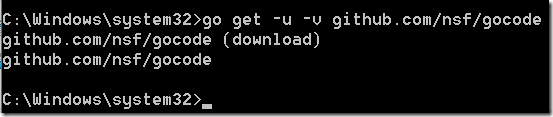
1)安装gocode
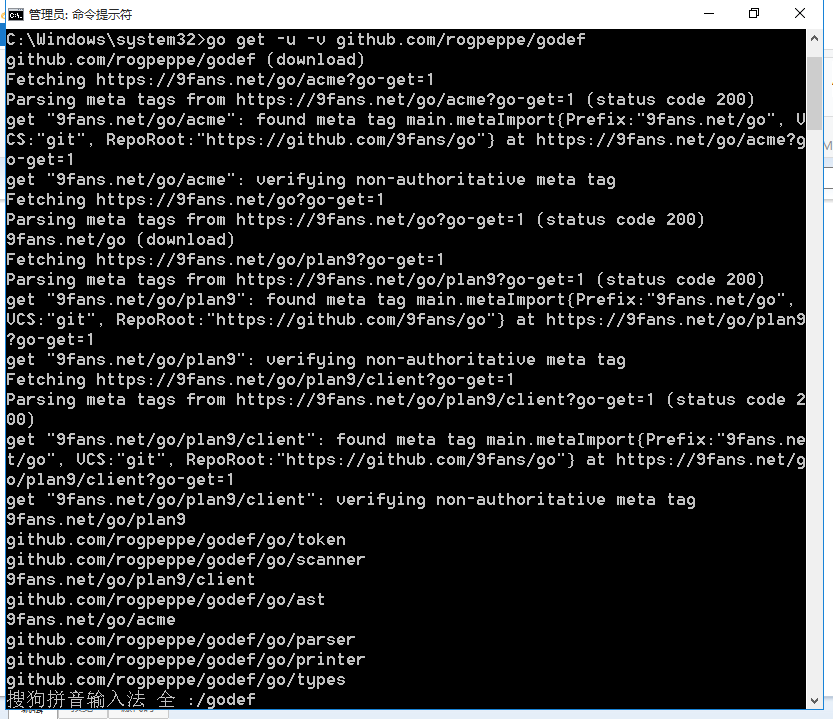
打开命令提示符(以管理员身份打开),输入:
go get -u -v github.com/nsf/gocode
开始下载:

下载完毕:
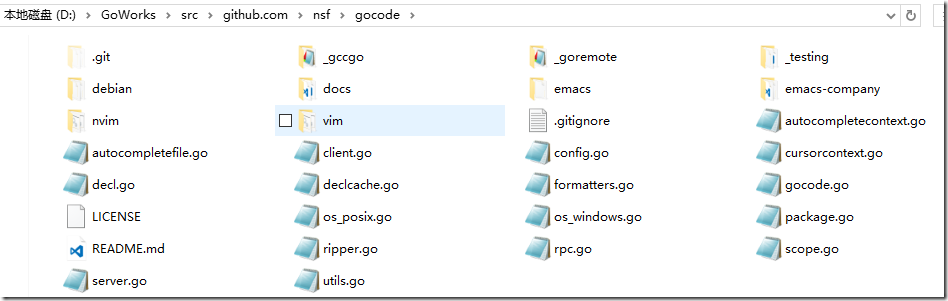
下载完成,查看D:\GoWorks目录,多了一个src\github.com\nsf\gocode路径,如下图:
雷同,通过命令行安装以下8个工具。
2)安装godef
go get -u -v github.com/rogpeppe/godef
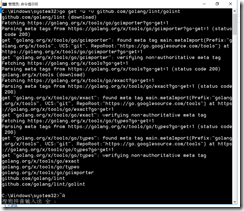
3)安装golint
go get -u -v github.com/golang/lint/golint
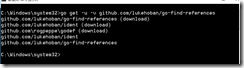
4)安装go-find-references
go get -u -v github.com/lukehoban/go-find-references
5)安装go-outline
go get -u -v github.com/lukehoban/go-outline

6)安装goreturns
go get -u -v sourcegraph.com/sqs/goreturns

7)安装gorename
go get -u -v golang.org/x/tools/cmd/gorename
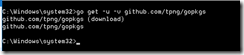
8)安装gopkgs
go get -u -v github.com/tpng/gopkgs
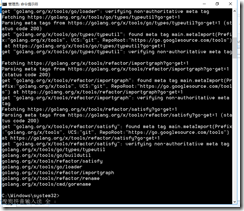
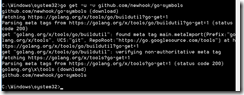
9)安装go-symbols
go get -u -v github.com/newhook/go-symbols
集成安装命令,拷贝到cmd窗口就可完成安装:
go get -u -v github.com/nsf/gocode
go get -u -v github.com/rogpeppe/godef
go get -u -v github.com/golang/lint/golint
go get -u -v github.com/lukehoban/go-find-references
go get -u -v github.com/lukehoban/go-outline
go get -u -v sourcegraph.com/sqs/goreturns
go get -u -v golang.org/x/tools/cmd/gorename
go get -u -v github.com/tpng/gopkgs
go get -u -v github.com/newhook/go-symbols
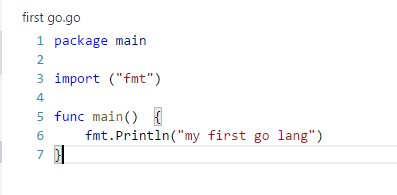
3、使用 Hello word
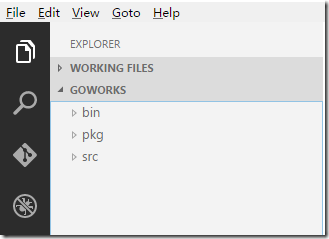
1)File-> Open Folder,现在工作目录:
2)新建go文件
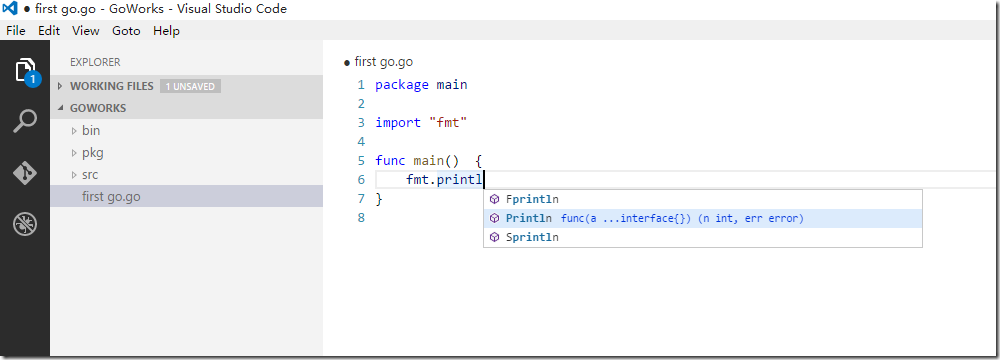
看看,智能提示出来了。
关于Visual Studio Code的调试功能配置,可查看:Windows环境下vscode-go安装日记
您可能感兴趣的文章:- Visual Studio Code 2020安装教程及CPP环境配置(教程图解)
- 使用 Visual Studio Code(VSCode)搭建简单的Python+Django开发环境的方法步骤
- Visual Studio Code配置C、C++环境并编写运行的方法
- 浅析Visual Studio Code断点调试Vue
- Visual Studio Code(vscode) git的使用教程
- Visual Studio Code 使用Git进行版本控制(图文教程)
- Visual Studio Code安装和配置的教程
